Relationships
This system allows you to represent connections between contacts by creating relationships.
For example, if an organization and its representatives are both in your database, it is useful to view either record and see that they are related.
You can also track relationships between organizations or between individuals and organizations. For example, entering an organization in the Employer field of an individual's record automatically creates an "Employee of" relationship from the individual to the organization and an "Employer of" relationship from the organization to the individual.
Creating Relationships Between Contacts
- Navigate to one of the records you want to relate.
- Click on Add Relationship from the Actions button on the contact summary or from the Relationships tab.
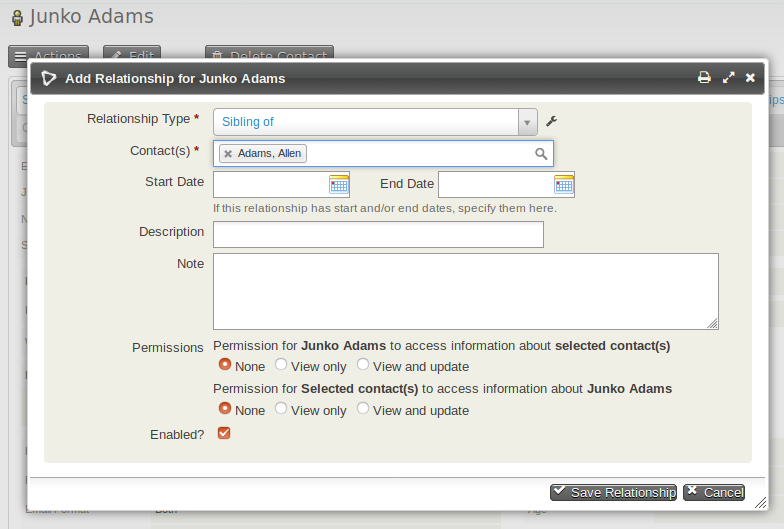
- Select the Relationship Type. For example, "Supplier Contact for" or "Works With."
- Begin typing the name of the related contact(s). If the related contact is not yet in the database, you can create a new contact from this screen.
- Optionally enter further information:
- Start Date and End Date for time-limited relationships.
- Description for a short note about the relationship.
- Notes for additional details about the relationship.
- Permissions to allow others to view or update the related contact.
- Enabled to indicate that the relationship is active.
- Click Save Relationship when you are done.
Relationship Permissions
If a relationship is created between two contacts (e.g., Contact A and Contact B), and the Permissions box is set to allow Contact A 'View' access to Contact B, then Contact A can view Contact B's details. If the permission is set to 'View and Update,' Contact A can also update details for Contact B.
Connecting Employees and Employers
A quick way to connect employees (individual contacts) to employers (organization contacts) is to use the Employer field in an individual's record. This creates the relationship automatically.
- Navigate to the individual’s record.
- Click Edit.
- Begin typing the organization name in the Employer field.
- If the organization already exists, select it from the dropdown.
- If it does not exist, type the name to create a new organization contact.
- Click Save.
- The system will create an "Employee of" and "Employer of" relationship automatically.
Other Ways Employees and Employers Can Be Connected
The Employer field can also be included on public forms. When processed, the system will attempt to match the employer name to an existing organization to avoid duplicates.
Adding Contacts to Organizations
- Select desired contacts from search results.
- Select Add relationship - to organization from the dropdown Actions menu.
- Choose a Relationship Type from the dropdown.
- Enter part of the organization's name in the Find Target Organization field and click Search.
- Select the matching organization or create a new one.
- Click Add to Organization to save the relationship.
Adding Contacts to Households
- Select desired contacts from search results.
- Select Add relationship - to household from the dropdown Actions menu.
- Choose a Relationship Type (e.g., Household Member of).
- Enter part of the household name in the Find Target Household field and click Search.
- Select the matching household or create a new one.
- Click Add to Household to save the relationship.
Creating New Relationship Types
This system includes default relationship types, but you can create custom relationship types as needed.
- Navigate to: Administer > Customize Data and Screens > Relationship Types.
- Review existing relationship types to avoid duplicates.
- Click New Relationship Type.
- Enter descriptive labels for the relationship:
- Label-A to B (e.g., "Supplier for").
- Label-B to A (e.g., "Client of").
- Define Contact Type A and Contact Type B (e.g., Individual and Organization).
- Optionally add a Description.
- Click Save.
Disabling or Deleting Relationship Types
If a relationship type is no longer needed, you can disable or delete it.
- Navigate to: Administer > Customize Data and Screens > Relationship Types.
- Find the relationship type and click More.
- Select Disable or Delete.
- Disabled types remain visible for existing data but cannot be used for new relationships.
- Confirm your action.
Disabled types can be re-enabled later if needed.